
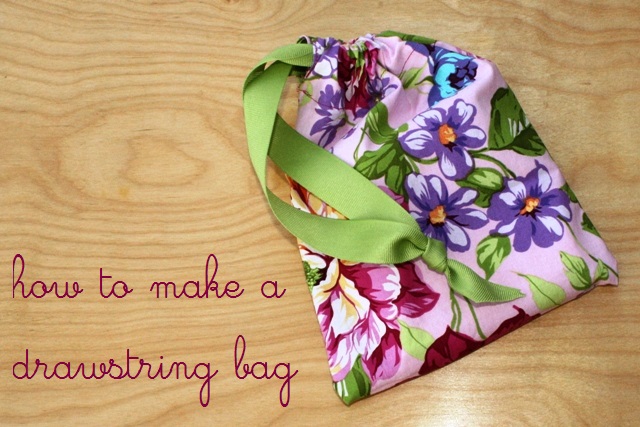
How to Make A Reusable Drawstring Bag
As an Amazon Associate I earn from qualifying purchases. For more details, please see our disclosure policy.
Need special packaging for a gift? Make a drawstring bag! Life as Mom contributor Janel will show you how to make a custom drawstring bag from fabric as well as one from a store bought pillowcase.
Want to save this post?
Enter your email below and get it sent straight to your inbox. Plus, I'll send you time- and money-saving tips every week!
Sometimes you’ve got a gift and it just calls for a little special packaging…especially if the gift calls for reusable packaging.
Recently, I made a little board game with small pieces and needed a bag to keep it all together when not in use. Because my game is larger than the store-bought drawstring bags that I saw, I decided to make my own from the oodles of scrap fabric I’ve got in my craft closet. The beauty of a DIY drawstring bag is that you can make it to your specifications while using what you’ve got.
How to Make A Simple Drawstring Bag:
Supplies:
- fabric of your choice
- scissors (pinking shears are nice if you have them and they help prevent fabric from fraying)
- iron and ironing board
- straight pins
- sewing machine & thread
- string or ribbon for the drawstring
- safety pin
Instructions:
- Cut out a piece of fabric that is long and wide enough to hold your gift item when the fabric is folded in half — I put my game board on my fabric and folded the fabric over to eyeball it. You’ll also need to add some more fabric to the length to accommodate the casing. The size of your casing will depend on what you plan to use as your drawstring. (My casing was rather large because I used 1-inch wide ribbon.)
- To prevent fraying on the inside of the bag and to give the casing openings a nice finished edge, you’ll want to sew down the side edges first. To do this, use the iron to press the raw side edges over by about 1/4 inch to the wrong side of the fabric. Pin in place if needed and use the sewing machine to stitch it down. (Please note, I did not do this because I was trying to use a particular scrap of fabric and was worried about my width. It will still work if you skip this step, but it gives a more finished bag if you have enough fabric to do it.)
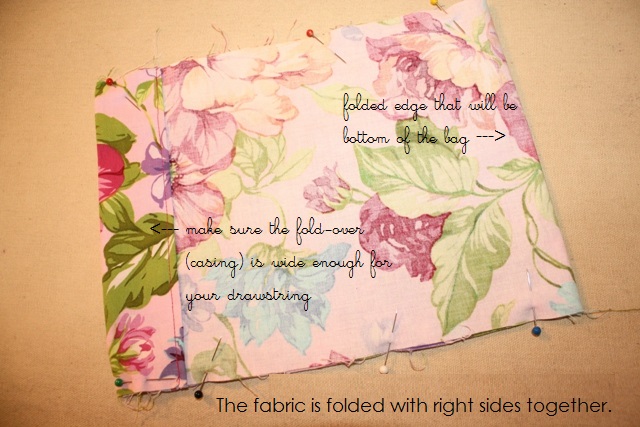
- Fold your fabric in half with the right sides together and iron a crease at the fold. (This fold will be the bottom of the bag.) Fold the top edges down by 1/4 inch and press with an iron. Fold over again to create the casing and press with an iron. How far you fold over will depend on how wide your drawstring is. (I folded mine over by about 1 1/4 inches because I was using a 1-inch ribbon as my drawstring.) Use straight pins to secure the casing.
- Use the sewing machine and stitch the edge of the casing to hold it in place. Do this on both sides.
- Keeping the fabric folded in half with the right sides together, pin the sides of the fabric together. Starting at the bottom of the casing, sew the two halves together along both edges. Turn the bag right-side out.
- Put a safety pin on one edge of the drawstring and thread it through the casing. Go in and out of the casing on one side and continue threading through the other side. Even out the ends of the drawstring and tie them together with a knot. Now, you have a drawstring bag!
Have you ever seen how Amazon “gift wraps” large packages? They just throw it in a big drawstring bag! You can easily make your own large drawstring bag in minutes with a pillowcase. No sewing machine required.
How to Make A Drawstring Bag from a Pillowcase:
Using a store bought pillowcase is a minimal-sew alternative that also allows you to wrap a large gift.
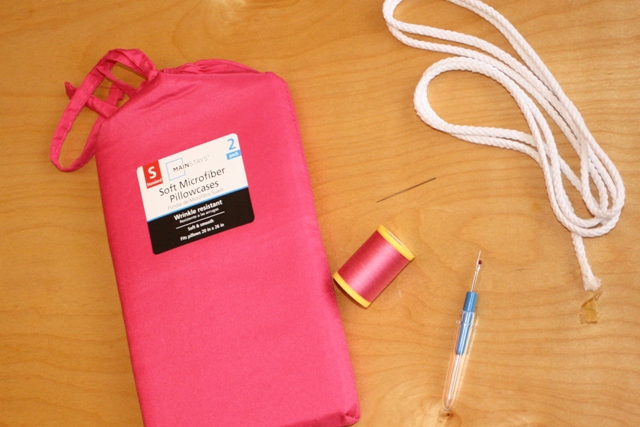
Supplies:
- pillowcase
- hem ripper
- needle & thread
- length of sturdy cord — about 1 2/3 yards
- safety pin
Instructions:
- Using the hem ripper, take out a small portion of stitches along the side seam of the pillowcase. You just want to make a hole large enough to feed through the cording. Ideally, your pillowcase will only have one side seam. The Mainstays brand from Walmart that I used had TWO seams, so I had to rip out a bit of the seam on each one.

- Use the needle and thread to fold under the now-raw edges at the opening. Hand stitch them down for a cleaner look. Do this on both seams if your pillowcase has two seams. Also, make a few stitches to reinforce the seam at the bottom of the opening.
- Attach a safety pin to one edge of the cord. Feed it through one opening, through the casing, and out the other opening. Pull the two ends of the cord together and tie in a knot. You’ve now got a large drawstring bag!
- The bag can be reused for another gift or it can be put to work in every day life. Stash one in the glove compartment in the car. It’s great to have on hand when it’s time to clean out the car. Or, use it in the laundry room for dirty laundry or to collect those clean, solo socks that have lost their mate in the dryer. It also works for travel — put one in your suitcase to keep your dirty duds separate from the clean ones.

Gift Ideas at Life as MOM that would be great in a drawstring bag:
- Fruit of the Spirit Ornaments – Keep these ornaments together during storage in a drawstring bag. Tuck the Bible verse from the printable into the bag so you can read the verse and make sure all the ornaments are accounted for when you take down your tree.
- Memory Game – Keep all of the pieces together!
 – Janel is a stay-at-home mom of two daughters and a “law school wife” in Virginia. Raised in a budget-conscious and DIY-minded family, she blogs about motherhood, crafts, and living on a law school budget at Life with Lucie and Ella. You can read all of Janel’s Life as MOM posts here.
For more gift ideas, check out this extensive list of DIY gifts for every man, woman, and child.


Thanks for the great step-by-step tutorial! Several years ago I tried to figure out how to make reusable gift bags out of fabric, because they seemed like a great solution to all the disposable gift wrap, but I couldn’t figure it out with my lack of sewing knowledge. I really appreciate the detailed directions!