A Tangled Birthday Cake Idea
As an Amazon Associate I earn from qualifying purchases. For more details, please see our disclosure policy.
Want to save this post?
Enter your email below and get it sent straight to your inbox. Plus, I'll send you time- and money-saving tips every week!
Rapunzel, Rapunzel, let down your long hair….
When I was a young girl, I had long, blondish hair that my mom would brush daily. And my mom would call me Rapunzel. I wasn’t really a princess, but in my eyes — and hers — I was.
(Thanks, Mom.)
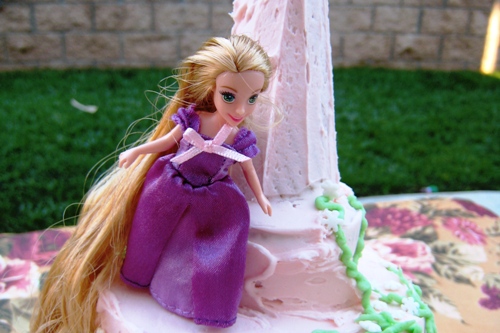
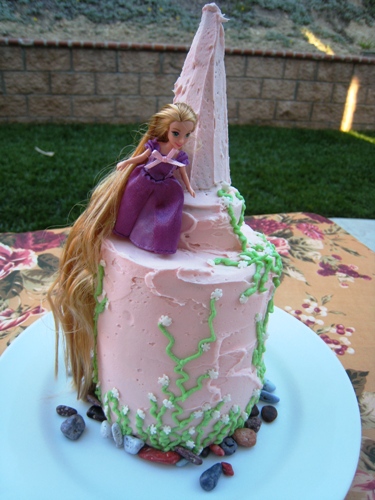
It’s no different with my own girls. They are my little princesses. And they love Princessy things. So, last week for FishChick4’s birthday, we had a Rapunzel cake, tailored after the new Disney release, Tangled.
Adding toys to your children’s cakes gives them a gift, party decor, and a cake all in one. FishChick loved playing with the Rapunzel doll that I bought to decorate the cake. But boy! Her hair does get seriously tangled. Oh my!
Believe it or not, a Tangled birthday cake is not that difficult to make. Here’s the step-by-step tutorial to make your own Rapunzel birthday cake:
Rapunzel – Tangled Birthday Cake
You will need:
small, round cake pans, greased
prepared cake batter to make four round layers and at least one cupcake
one batch Homemade Buttercream frosting or two tubs of white, store bought frosting
ziploc bag or pastry bag with writing tip
paste food coloring in green and castle color
one sugar cone
one chopstick
parchment paper or waxed paper
flower or snowflake shaped sprinkles
candy rocks
Rapunzel doll
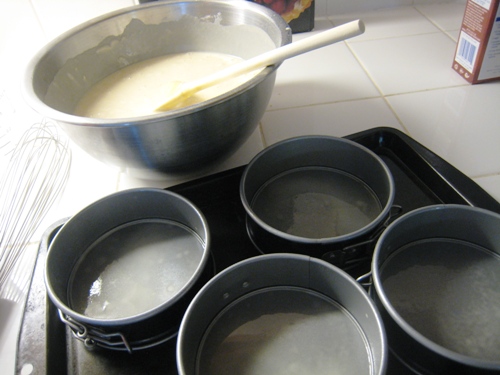
I used four small cheesecake pans for our tower. Since we’re testing egg-free recipes, I used a cake recipe from Bakin’ Without Eggs, but you can use your favorite cake recipe. Grease the pans well with non-stick spray or your favorite cake lubricant.
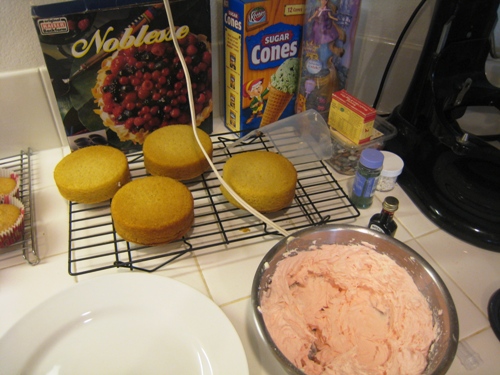
Fill the cheesecake pans half full and then use the excess batter to make a dozen cupcakes. You’ll need at least one cupcake for this cake.
Prepare the buttercream frosting. Reserve about a cup of the frosting to dye green. Die the rest of the frosting to be the color of your castle. My princess chose pink.
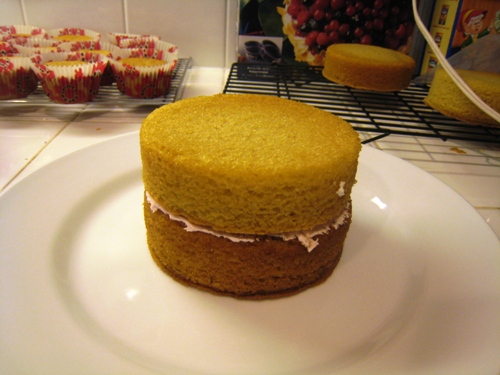
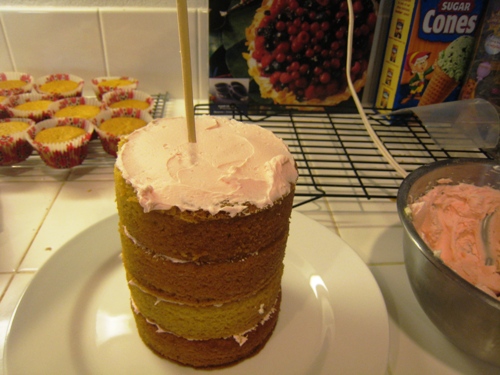
Apply a thick layer of frosting to the first round and stack the next round on top. Continue this “bricklayer” process until all four layers are stacked.
Stick a chopstick through the center of all four layers to add extra stability.
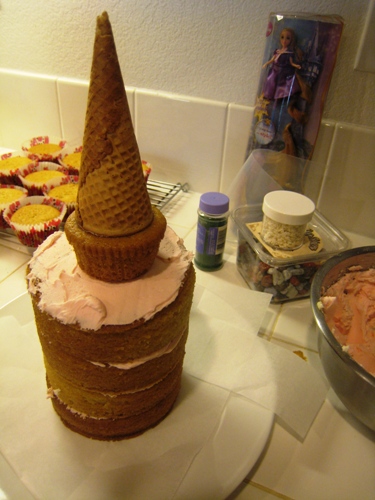
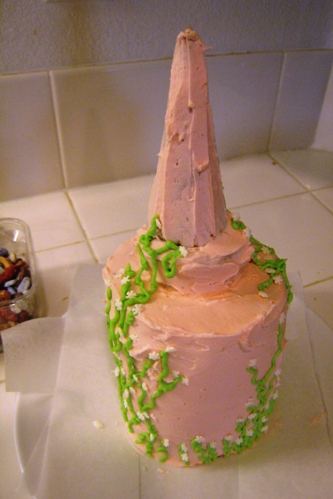
Skewer a cupcake onto the chopstick, frost the top of it and place the sugar cone on top. Place strips of parchment paper around the cake in between the surface of the serving dish and the cake. This will keep the cake clean of frosting blobs.
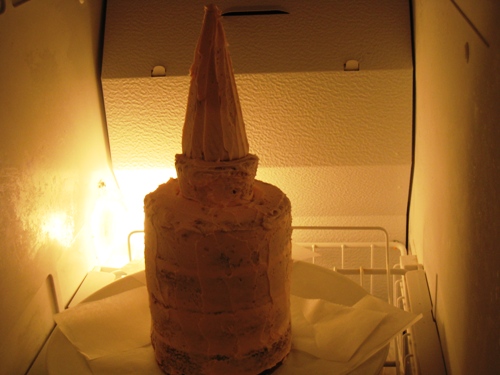
Frost the entire castle with a thin layer of frosting. This is called the crumb coat. It helps to glue down any stray crumbs so that they won’t be visible on the finished product. I place mine in the freezer for about ten minutes to solidify the frosting. Then add a thicker layer of frosting all over the cake.
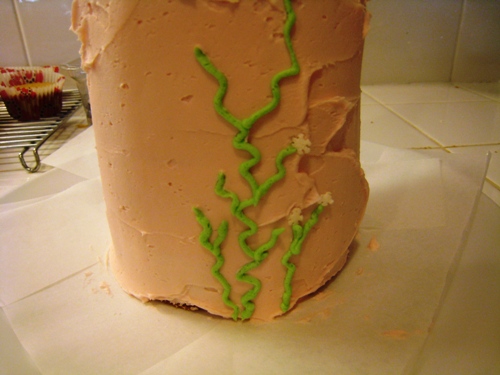
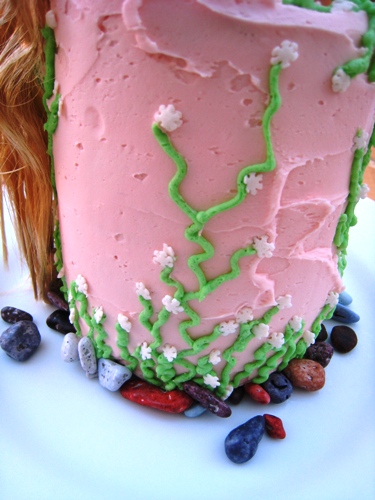
Place the green frosting in a pastry bag fitted with a writing tip. You can also use a ziploc bag with a small corner cut off. The pastry bag, however, will give you more control as you draw ivy. Try this starter set from Wilton.
This is one of the fun parts! It’s amazing how this ivy will really transform the cake! Draw squiggly green lines up the sides of the cake. Place flower or snowflake shaped sprinkles in and around the ivy.
Next, place candy rocks around the base of the castle. Not only does this hide any gaps between the cake and the plate, but these candy rocks are also a huge hit with the kids. These chocolate rocks are available at Walmart and Amazon and bulk candy stores.
Pose Rapunzel at the top of her tower. Since it was a warm day, I place the whole cake in the freezer for another ten minutes so that her hair wouldn’t get all messed up in the frosting.




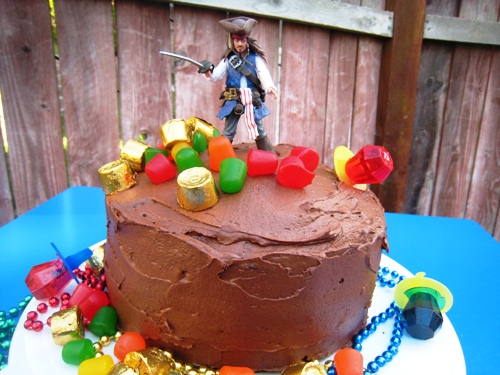
I made your cake for my daughter’s 5th birthday. We did a Princess Ball. The cake was a huge hit! I added the rock door on the back and green sheet cake in front (I was worried about not having enough cake and cutting the tower in front of people!!!) We ate the sheet cake at the party and the tower at home the rest of the week!! It was very easy thanks to your wonderful directions!!! My little princess LOVED it! Thank you for making me look good!!!
My pleasure! So glad it worked out!
We had the same problem with Rapunzel (which is playing on the TV right now!) and I tried, as a last resort, detangling spray that I use in my daughters hair. It worked so well that we not only saved Rapunzel, but also all the other Barbies got a “freshening up”.
WOW! I will keep that in mind. Really?! I’m stunned. LOL
This is amazing I’m going to use your idea for my daughters 5 th Birthday Rapunzel Birthday party!! I’m going to do a pink tower castle and the green ivy to, but i’m going to try to make the flowers and write on the cake too, and maybe add to it. I made her a Tinker bell cake and used the glass as a tower and a small piece of cake for the flower and then the base was all pink!! Tinkerbell was on the flower it turned out wonderful and she loved it. We just thought of the idea that evening!! Thank you so much!!
Send me a photo when it’s done!
Loved this! I used gray frosting (a little wilton black in my buttercream) and then violet for the roof. All the preschoolers at my daughter’s party LOVED it. If you have the tower toy, the plastic doll works perfect (and you don’t have the frosting in the hair issue b/c hers is plastic!)
We removed the cupcake/cone (which thrilled the girl who received that piece) and then made thin slices of the stacked cake. I also served 18 cupcakes with it and it worked perfectly.
So FUN! I did a Tangled Party for my daughter but we didn’t even do a cake–I did pies in frying pans! 😉
@oh amanda, very clever!
I love this cake. Any ideas about Scooby Doo or Spiderman?
Perfect timing! I’ve been trying to come up with a Tangled cake idea for my daughter’s bday in April and I have been stuck! Thanks for sharing!!
BTW– We ended up braiding our Rapunzel doll’s hair b/c I spent too many times untangling her hair!
@Kristina @ A Home Made by Kiki, I had to throw out the first Rapunzel because her hair was such a nest. My daughter bought another, bigger size one and I’ve insisted on the braid with the new one. No braid, no play. 🙂
Awesome! I bet that was one happy little girl! great job!
Hi,
My daughter will be 6 in April and wants a Repunzel party. How did you keep the hair from sticking to the cake?
I chilled the cake before putting Rapunzel on. That way the frosting was firm to the touch.
WOW! What a great idea – and I’m not an experienced cake maker, so I was worried about making a tower when my Mom (who always has made my daughter’s cakes, but this is her first year she won’t be in town for her birthday) told me I could try to make a tower. I was thinking that was too much for me, but now I have inspiration from your cake and showed my daughter and she loves it! She said, “you can make that for me – let’s do it!” hahaha – her birthday is in March, but now I can relax that I can have guidance! 🙂 Thanks!
I love this cake idea. I’m going to use it for my daughter’s next birthday. I was just wondering. How did you cut it? Did you end up taking it apart to cut it? Thanks for the wonderful idea!
We just cut the top layers first. It got eaten pretty quickly since it’s not even a full cake mix.
Thanks so much for the idea! Can’t wait to make it for my 7-yr old daughter’s birthday.
My 8 yo would love this cake! She can’t wait to see the movie. I have not tried a cake this tall or fancy but from your directions looks like I could manage it.
If I can do it, you can. It’s not difficult at all. Promise. 😉
OMG! U totally rock.. Let me see if I can get this done for my toddler’s 3rd birthday.. I bake but only regular cakes and have NEVER tried making fancy ones. Guess, time for me to get your ebook..
Love it! My daughter is very keen on Tangled right now, so I would be the world’s best mom if I pulled this off for after we see the movie.
You are supermom! Really. I have to make a Dinosaur Train Cake in a couple of weeks. I am going to work with fondant for the very first time. Wish me luck!
how cute!
This is beautiful. It could work for a boy with some grey icing a few knights, flags and a graham cracker draw bridge. I think I just solved my 8 year olds next birthday cake dilemma! Thanks!
@Sue Rogers, what an excellent idea!
you made a darling castle cake for your daughter. she’ll remember it for years. many moons ago, when i was 5, my mom made me a princess cake (angel food cake, barbie in the center, icing for dress bodice goes on barbie and and the cake becomes the dress skirt). you’re making wonderful memories!
Do you have a recipe for chocolate buttercream frosting?
Thanks!
@Kelly Hess, last week for FishBoy10’s birthday, I just added 2/3 cup cocoa to my regular recipe. Yummy!
@Jessica Fisher,
THANK YOU! I made this icing this past week and my husband LOVED it. He made me vow to never buy canned icing again. My son’s 2nd birthday is Saturday and I am making his cake with this icing! I’ll send you some pictures!
Thanks alot!! That is a supercute cake!! Now that I am a mom of my own little princess soon to be 1yrs old, this is definately something to save in my files for future use!!
Thanks so much!!
Dana sahm to 2 boys and a girl in VA.