
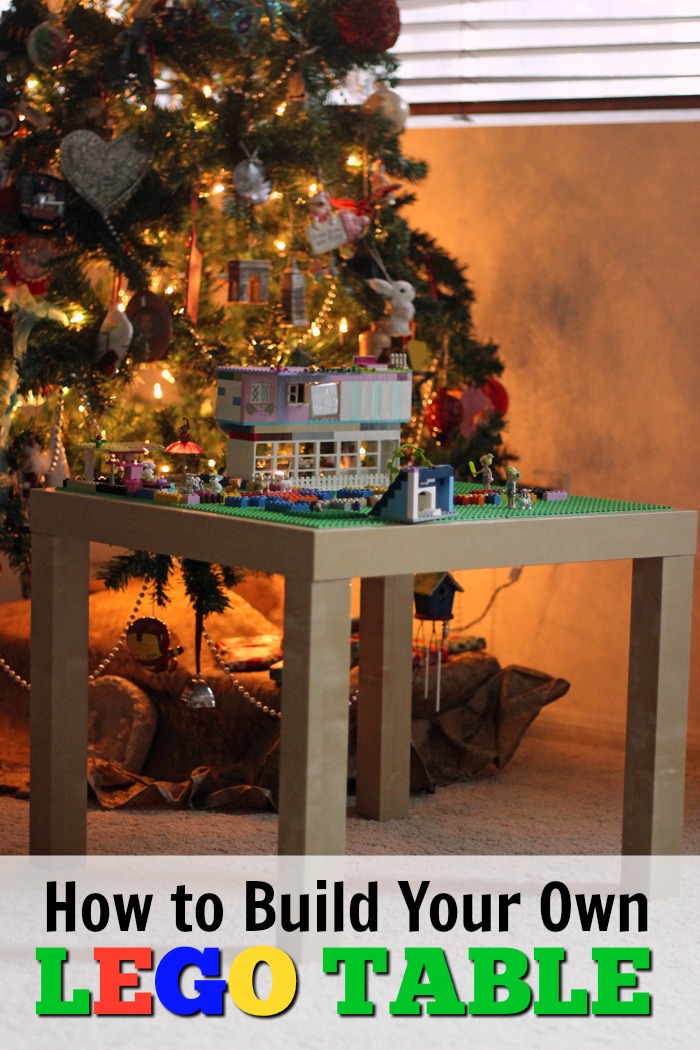
Learn How to Build Your Own Lego Table.
As an Amazon Associate I earn from qualifying purchases. For more details, please see our disclosure policy.
Got a Lego-maniac at your house? Instead of buying another set of bricks, build a Lego table to make building even more fun.

Want to save this post?
Enter your email below and get it sent straight to your inbox. Plus, I’ll send you time- and money-saving tips every week!
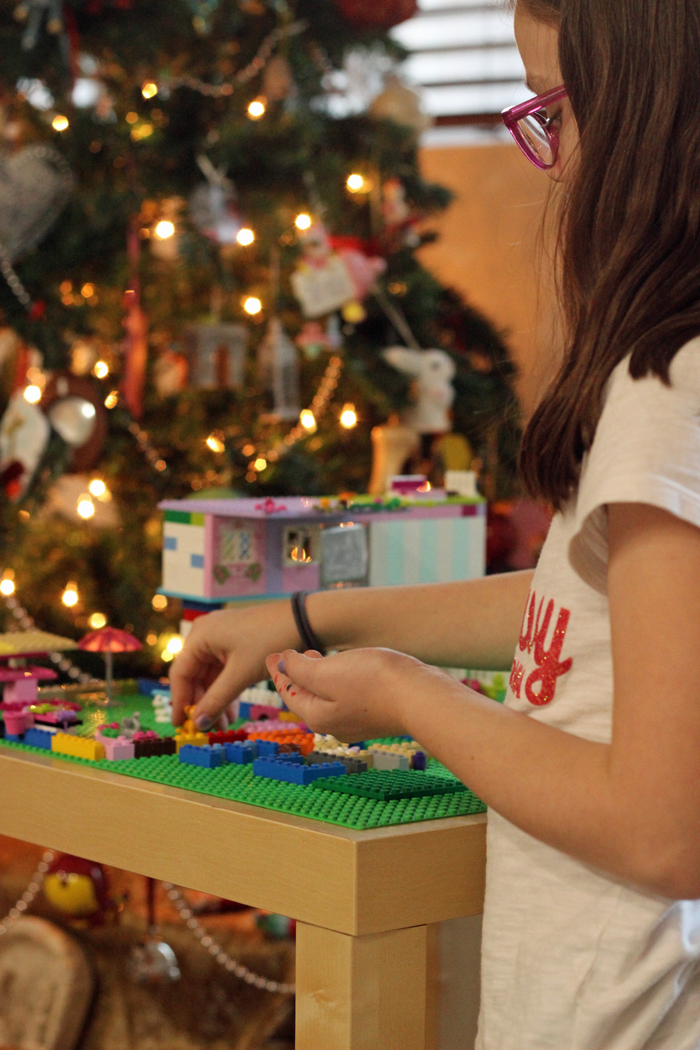
I have 4 young Lego addicts at my house, and we’re always running out of spaces to build with them. I’ve thought about buying a Lego table for them for years, and finally decided to try my hand at building one for them. I couldn’t be happier with the results!
My only regret is that I postponed this project for so long. It took me less than 10 minutes to make, and cost less than $30–a bargain compared to the tables for sale out there.
This project was a breeze, and you can easily make your own for the little Lego lovers in your life. It’s one of the easiest frugal gift ideas out there.
What you need to make your own Lego table:
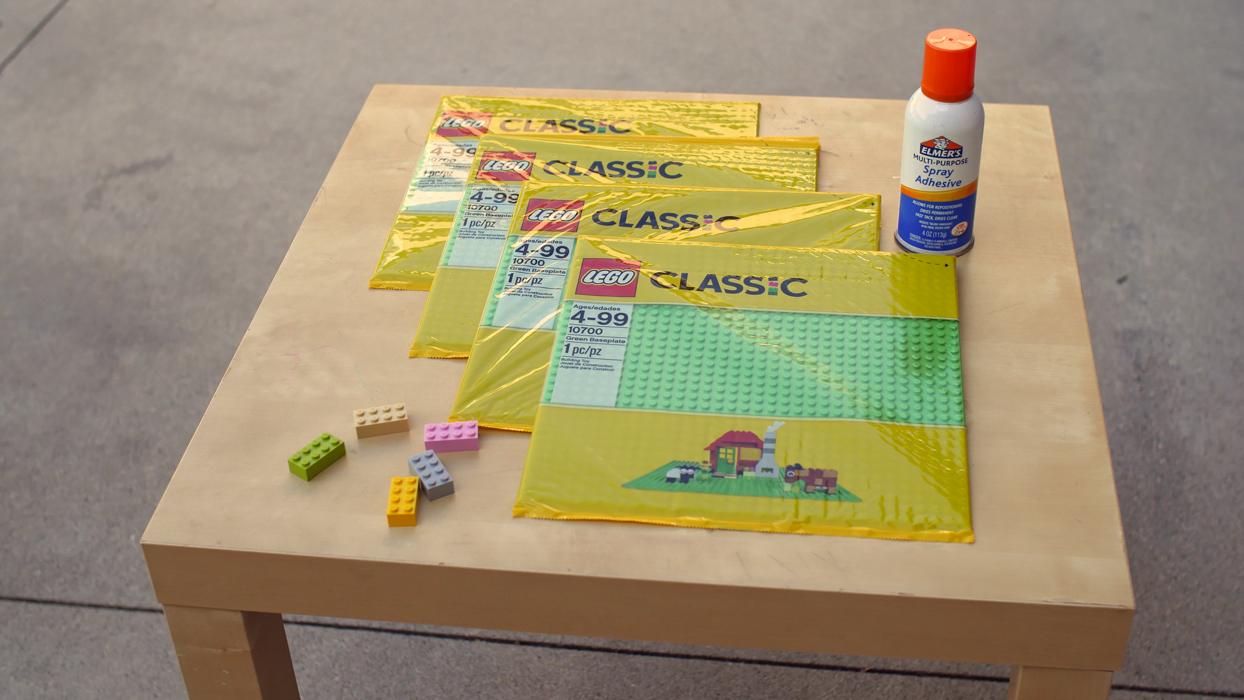
A table, new or old – The IKEA LACK table is perfect for this. The top is 21 5/8 inches square.
Lego plates to cover the table – Ten-inch base plates work perfectly for the LACK table.
A few Lego bricks – You’ll use these to insure proper spacing between the plates.
Spray adhesive, like Elmer’s Craft Bond spray adhesive or something like Liquid Nails works well.
A large flat surface – to help properly position the Lego plates
4 sheets of parchment paper or newspaper – to catch the overspray of the adhesive
Optional: pencil and ruler
How to build your own Lego table:

1. Arrange your Lego plates on the table to roughly determine placement.
Important: using Lego bricks, join your plates together. You will see that there should be a slight gap between the plates. You want to space the plates so that they will work properly for building on top of later.
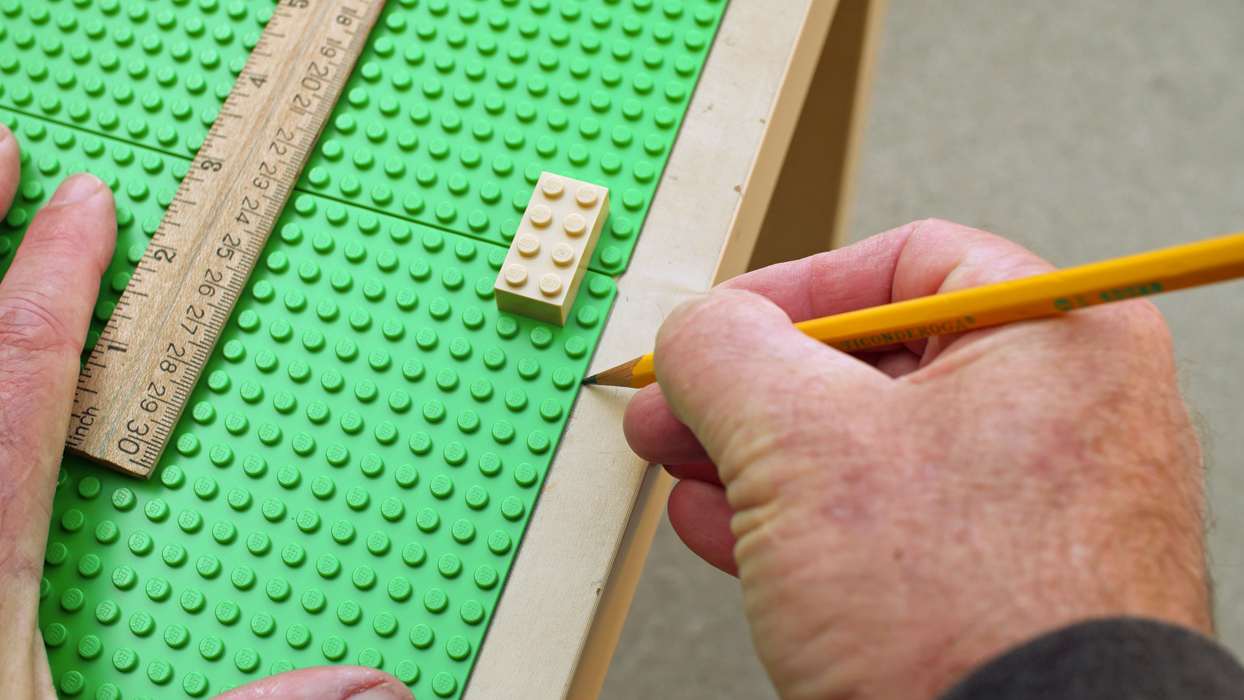
2. Mark the table for the appropriate placement of the plates.
This is an optional step, but can help ensure that the four plates are centered on the table where you want them.
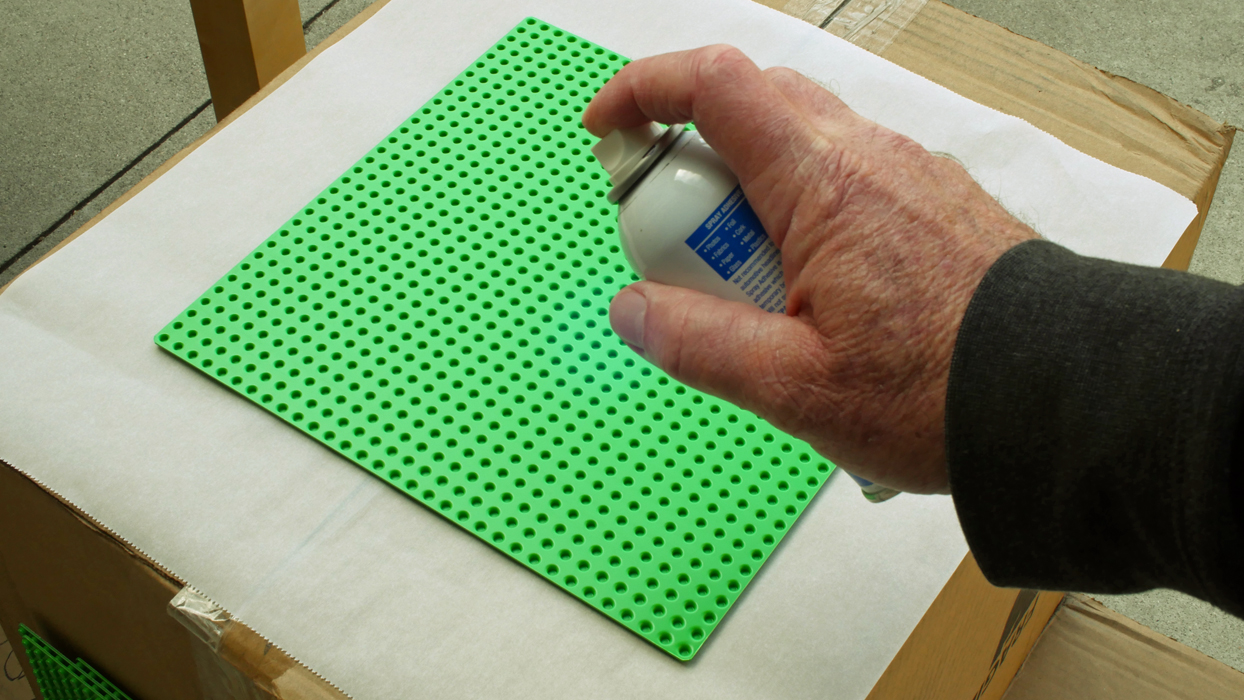
3. Apply a thin layer of adhesive to your plates.
Place the plates on the parchment and spray. You’ll want a fresh piece of parchment for each plate so as not to get adhesive on the front of the plates.
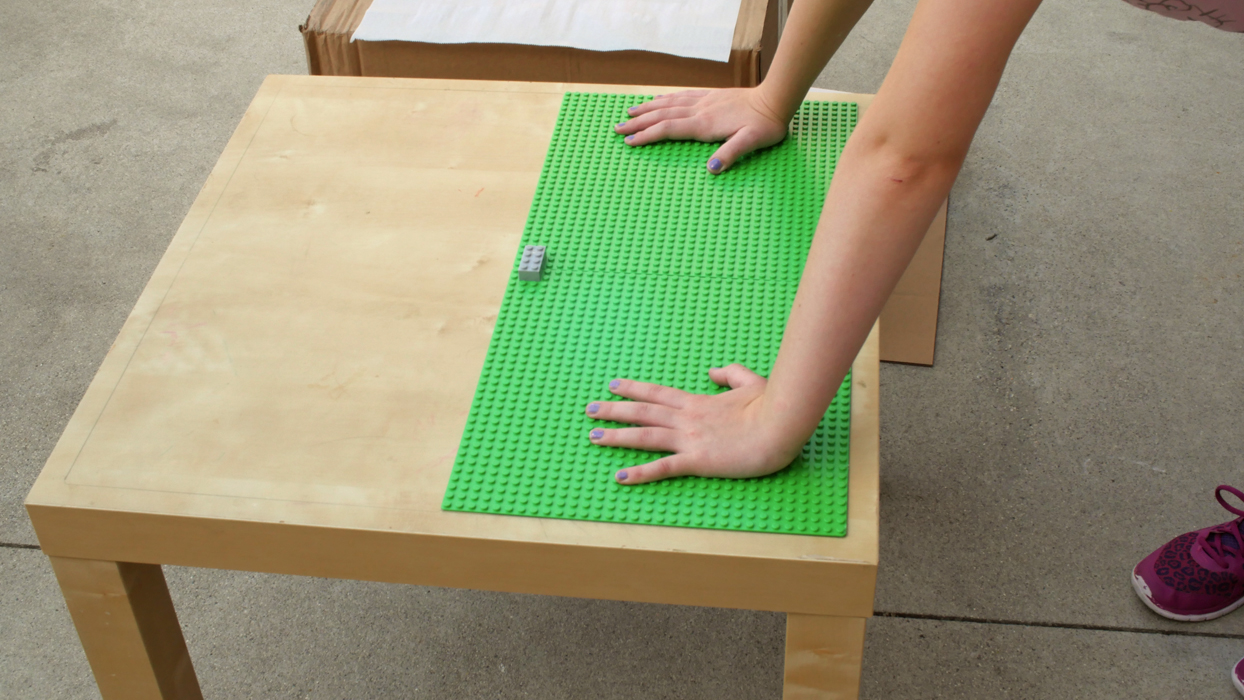
4. Place the plates on the table.
Making sure that the plates are appropriately spaced with the Lego brick, place them on the table, right up to the pencil marks. Press evenly to adhere. Let sit for the time recommended on your adhesive’s directions.
5. Get to building.
At this point your kid needs no instruction on what to do!
This post was originally published on December 20, 2012. This tutorial was originally designed by Anne from Modern Mrs. Darcy. Recently, FishPapa crafted one for our youngest Lego fan, and so we’ve refreshed the photos and added a few extra tips. The post has been updated for content and clarity.


I have a 29 /12 by 23 1/4 train table and want to purchase the peel and stick from Amazon. What size and how many should I order?
I have not seen peel and stick Lego plates, but you’d want to have sizes to cover the top. You may need to find thinner baseplates to fill in the gaps or simply have a larger border around the sides.
So does that spray glue hold pretty well?
Follow the directions and it should work well.
Just found this and noticed it from 2012! Still very practical today though!
Went to Ikea and they still have the tables for $7.99-$9.99. Bought a white one for $7.99. The lego plates are now $9.99, but Toys R Us had them on sale for $7.52 each. Will be doing the gluing tomorrow. Still a decent project for under $50.
I’ll also be putting some sort of storage underneath like another poster said.
Thanks so much for the update!
I just read this post from 2012 and 2016. What did you use for the storage under the lego table? I have an old pink and yellow toddler size Dora and Boots table that my preschoolers have outgrown. I want to spray paint it and create a lego table with storage. Any suggestions?
I would like to put my Lego’s in the center of table. Any thoughts?
Have you googled it? There may be some tutorials to create a storage bin the center.
I placed a slide-out bin underneath the table. It’s great for storing their projects or leftover Legos.
Excellent idea!
Hi moms. Im a 54 year old grandfather with a 6 year old grandson who loves legos. He has a lego train set and some of the city buildings. I wanted to build him a table to incorporate the train set either around or through the city. I have racked my brain trying to find a large enough table. Thanks to your great ideas I just need 4 smaller tables that will fit through the doors. THANKS A BUNCH !
What a great plan!
Just finished the lego duplo train table for my 2yr old twins bday (before I red this pg) 3 – 2’x4′ sheets & some 2″×2″s for legs. Search “Lego train table” on Pinterest.
Where did you get the lego plates
You can buy them on Amazon or the Lego store. Sometimes Walmart or Target have them.